Table Of Contents
Connecting the Water Supply
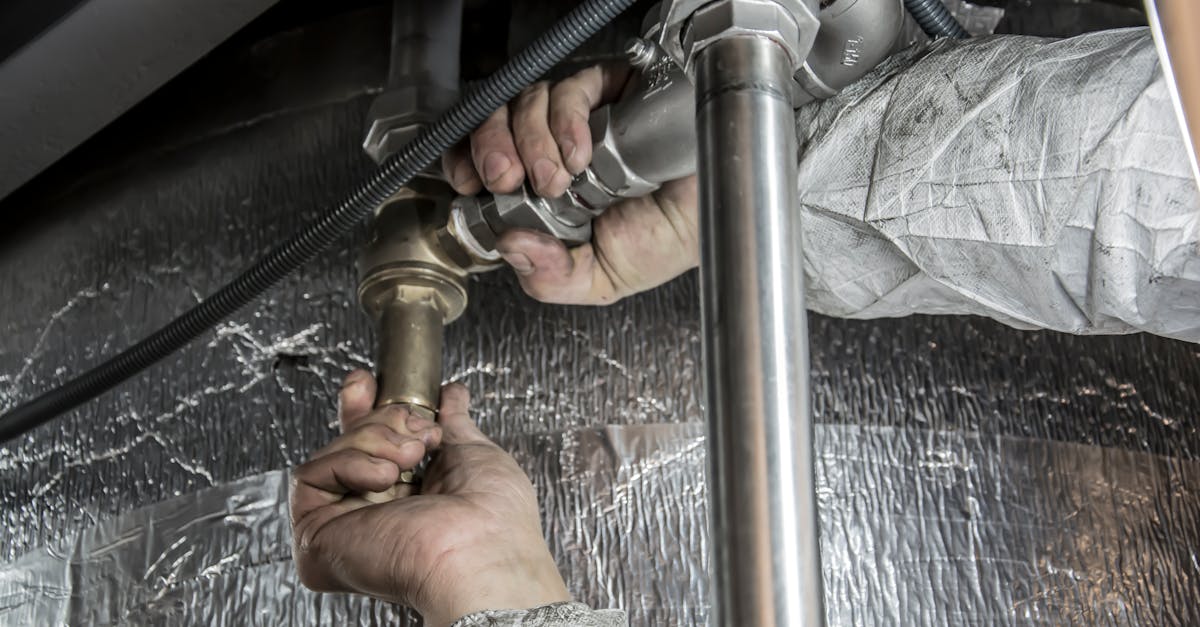
Before starting the toilet installation process, it is essential to connect the water supply properly. Begin by locating the main water line, typically situated behind the toilet area. Ensure that the shut-off valve is turned off to prevent any leaks. You can use a flexible water supply hose for this connection. Connect one end of the hose to the valve and the other end to the tank inlet on the toilet. Tighten the fittings carefully, ensuring a snug fit without over-torqueing, which can damage the components.
Once the hose is attached, turn the shut-off valve back on slowly to allow water to flow to the tank. Check for any leaks at the connections by observing the fittings for moisture. If any leaks are detected, turn off the water supply immediately and tighten the connections. Proper water supply connection is crucial in toilet installation and repair, as it directly affects the functionality and efficiency of the toilet system. Regular maintenance following installation helps ensure that the connections remain secure and free from leaks over time.
Steps for Safe and Effective Water Connection
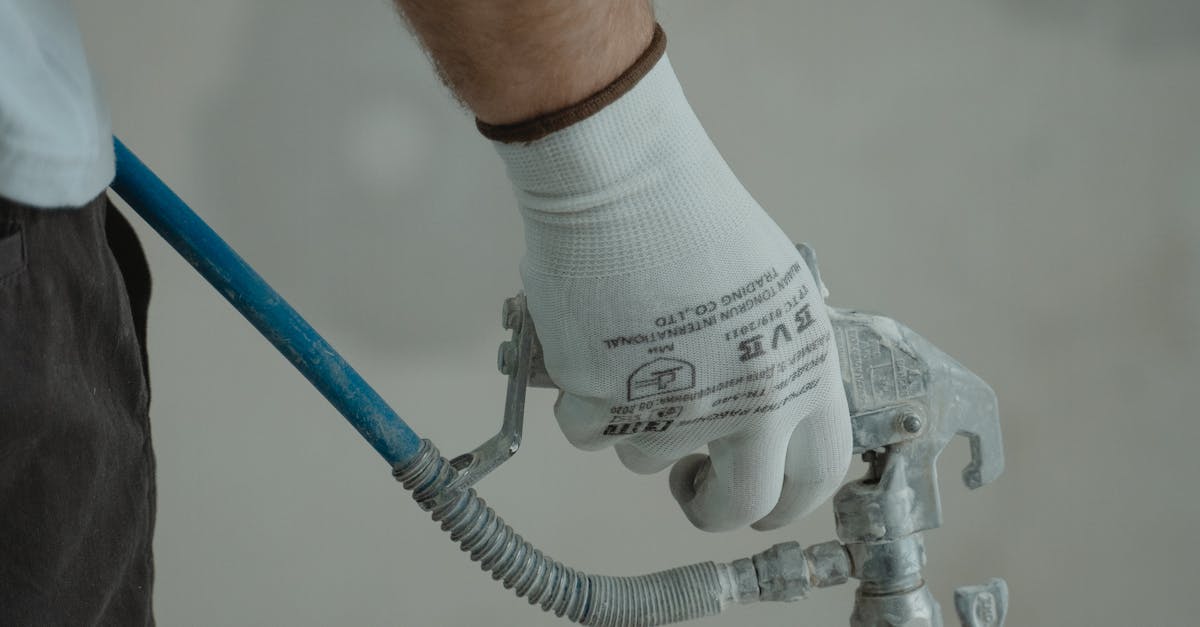
When connecting the water supply for a wall-mounted toilet, ensure you first turn off the main water valve. This prevents any unexpected leaks or water flow while you work. Use a quality flexible hose to connect your toilet's water inlet to the water supply line. It’s essential to select the appropriate length and type of hose based on your specific installation requirements, as this contributes to a solid and reliable connection.
Before tightening the connection, inspect all fittings and gaskets to ensure they are in good condition. A worn or damaged part can lead to leaks down the line. Once everything is in place, slowly turn the water supply back on while checking for any leaks. If everything is secure, you can proceed with the next steps in your toilet installation and repair. Remember, a careful approach during this phase sets the foundation for a long-lasting installation.
Mounting the Toilet Bowl
The mounting process for a wall-mounted toilet bowl is crucial for both functionality and aesthetics. Begin by ensuring that the wall frame or bracket is securely in place. It's essential to follow the manufacturer's specifications for installation, as each model may have specific requirements for height and positioning. Once the bracket is verified, the bowl can be carefully positioned to align with the mounting hardware. The use of a level will help ensure the bowl sits evenly on the wall. After alignment, secure the toilet bowl with the provided bolts, taking care not to overtighten them to avoid damaging the fixture or the wall.
After the bowl is mounted, it’s important to check that all connections are tight and free from gaps. This phase of installation is vital to prevent leaks and ensure long-term performance. If necessary, adjust the bowl’s position slightly before finalising the connections. Toilet installation and repair should always adhere to local plumbing codes, ensuring that all plumbing fixtures are installed safely and effectively. Once satisfied with the alignment and the fitting, apply a suitable sealant around the base of the toilet bowl for added protection against moisture ingress.
Techniques for Securely Attaching the Bowl
When it comes to securely attaching the toilet bowl to the wall, precision and attention to detail are essential. Begin by aligning the bowl with the wall-mounted carrier, ensuring that the mounting brackets fit snugly into the designated slots. Use a spirit level to check that the bowl is perfectly horizontal. Once positioned accurately, insert the bolts through the mounting holes and tighten them using a wrench. This step requires a careful approach; overtightening may cause cracks in the porcelain.
Next, consider the rubber seals that ensure a watertight connection between the bowl and the toilet flange. Installing a high-quality wax ring is critical in preventing leaks. Once you have placed the wax ring, lower the bowl onto the flange, applying even pressure to establish a secure seal. After confirming that the bowl remains stable and level, re-check the bolts for tightness. This attention to detail contributes to the longevity of the installation while ensuring that any potential issues can be addressed effectively during toilet installation and repair.
Sealing and Finishing Touches
Sealing the connections properly is crucial for preventing leaks and ensuring the longevity of your wall-mounted toilet. After securely mounting the toilet bowl and connecting the water supply, apply a high-quality silicone sealant around the base of the toilet. This creates a waterproof barrier that helps to avoid water infiltration. Ensure the area is clean and dry before applying the sealant for the best adhesion. Take care not to over-apply, as too much can create a messy appearance.
Additionally, focus on the finishing touches to enhance the overall look and functionality of your installation. Once the silicone has cured, it’s wise to check for any remaining gaps or potential weak points in the seal. Doing this not only reinforces the integrity of the installation but also simplifies future maintenance. Remember, thoroughness in these last steps contributes significantly to successful toilet installation and repair, providing peace of mind for years to come.
Tips for Ensuring a Watertight Seal
Ensuring a watertight seal is crucial for preventing leaks and maintaining the integrity of your wall-mounted toilet. Start by thoroughly cleaning the area around the flange and the bottom of the toilet bowl. Any debris or residue can compromise the seal. Use a high-quality wax gasket specifically designed for toilet installation and repair, as it provides the best barrier against potential leaks. Position the gasket over the flange with care, ensuring it fits snugly without any gaps.
When attaching the toilet bowl to the wall and floor, apply even pressure while securing it to the mounting brackets and anchor bolts. This will help compress the gasket adequately and create a tight seal. After the installation, patiently check for leaks by flushing the toilet and inspecting the area for any signs of water escaping. Regular maintenance of these seals is important, as any wear or damage can result in costly repairs down the road.
FAQS
What tools do I need to install a wall-mounted toilet?
You will typically need a drill, level, wrench, pipe cutter, measuring tape, silicone sealant, and possibly a socket set, depending on your specific toilet model and installation requirements.
Is it necessary to hire a plumber for installing a wall-mounted toilet?
While it is possible to install a wall-mounted toilet yourself if you have plumbing and DIY experience, hiring a plumber is advisable for ensuring proper installation and avoiding potential issues.
How do I ensure my wall-mounted toilet is securely attached?
To securely attach the toilet bowl, follow the manufacturer’s instructions carefully, use appropriate mounting hardware, and make sure to level the bowl during installation to avoid any future problems.
What should I do if there is a leak after installation?
If you notice a leak, first turn off the water supply, then check all connections and seals for tightness. If necessary, disassemble the affected area, apply new sealant or replace gaskets, and reassemble carefully.
Can I install a wall-mounted toilet in any bathroom?
Not necessarily. Wall-mounted toilets require specific wall support and space for installation. It’s important to evaluate your bathroom’s structural integrity and layout to ensure compatibility before proceeding.